After creating, and configuring a workflow, you can assign the workflow to columns in Metadata Manager.
Before you assign workflows to columns:
- Ensure that you select Metadata Manager as module and Column as object while adding the workflow to the folder.
- The default workflow, Metadata_Manager_Default_Workflow is assigned to all the columns. Hence, you need to override the existing default workflow.
To assign workflows to columns, follow these steps:
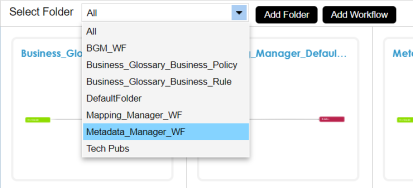
- In the Workflow Manager page, select a folder.
All the workflows in the folder appear. - Hover over the required workflow and click
 .
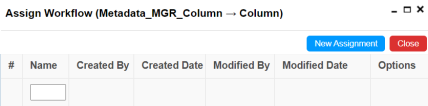
. - Click New Assignment.
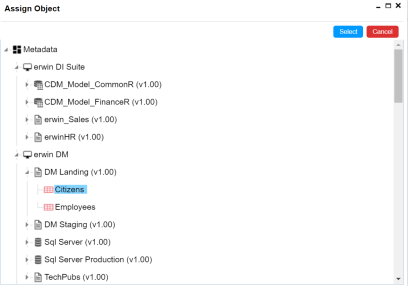
- In Assign To field, click
 .
. - Select a table with necessary columns and click Select.
- Click Yes to override the existing workflow.
- Select the appropriate Fallback/New Status.
- Click Next.
- Enter relevant comments, and click
 .
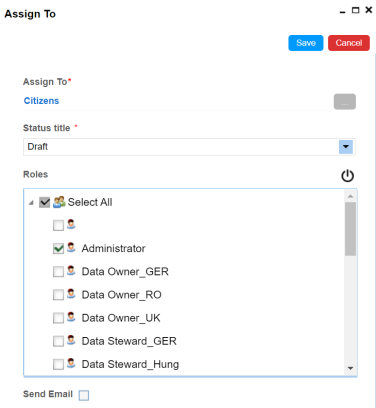
. - Select the Status Title from which the workflow starts.
- Select the appropriate Roles.
- Select the Send Email check box to receive email notification.
- Click Save.
The Assign Workflow page appears.
The Assign To page appears.
The Assign Object page appears.
A warning message appears giving you an option to override the existing workflow.
The Workflow Re-Assignment page appears displaying the Current Object Status.
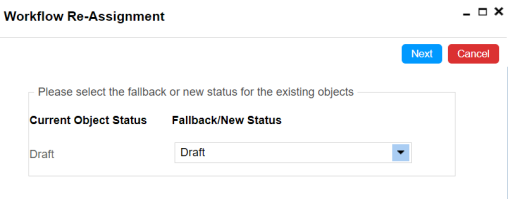
The options for Fallback/New Status depends on the stages defined in the workflow.
The Comments page appears.
The Assign To page re-appears with Assign To field filled.
A Status Title is assigned to a stage while creating the stage.
The workflow is assigned to all the columns in the selected table.
Once the workflow is assigned successfully to the columns in the selected table, users who are part of the assigned roles will get work queue notifications. For more information on workflow execution, refer to the Executing Workflows for Columns via Workflow Queue.
|
Copyright © 2023 Quest Software Inc. |